Content teams and agencies are under constant pressure to produce more content, faster, without sacrificing quality or search visibility. If you have ever spent a Monday morning manually copying keywords into an AI writing tool, pasting the output into WordPress, submitting URLs to Google Search Console one by one, and then trying to remember which articles actually got indexed, you already know the problem. It is exhausting, error-prone, and does not scale.
A Zapier AI content workflow solves this by connecting your AI writing tools, CMS, SEO platforms, and indexing systems into a single automated pipeline. Instead of stitching together a dozen manual handoffs, you build a chain of automated steps that handles ideation, generation, publishing, and indexing with minimal human intervention.
In this guide, you will learn how to build a practical, end-to-end Zapier AI content workflow from scratch. We will cover everything from identifying content opportunities to publishing SEO and GEO-optimized articles and triggering fast indexing so search engines discover your content within hours rather than weeks.
GEO, or Generative Engine Optimization, is worth understanding before we dive in. It is the practice of structuring content so AI models like ChatGPT, Claude, and Perplexity cite it in their responses. Traditional SEO targets search engine rankings. GEO targets AI-generated answers. Both matter now, and the workflow you are about to build addresses both.
Whether you are a solo founder trying to compete with larger teams, a marketing department looking to scale output, or an agency managing content production for multiple clients, this workflow will help you produce more without adding headcount. Zapier connects over 6,000 apps via triggers and actions, making it a practical orchestration layer for content automation without requiring custom code.
By the end, you will have a repeatable, closed-loop automation that handles the heavy lifting so your team can focus on strategy, creativity, and growth. Let's build it.
Step 1: Map Your Content Pipeline Before You Build Anything
The most common reason Zapier workflows break is not a technical glitch. It is a planning gap. Someone starts building Zaps before they know exactly what data needs to flow between each tool, and by step three they realize a critical field is missing. Avoid this by mapping your entire pipeline on paper before you open Zapier.
Start by defining your trigger events. What kicks off the content creation process in your team? Common options include a new row added to a Google Sheet (for keyword-driven workflows), a scheduled time-based trigger (for teams running a fixed publishing cadence), a form submission via Typeform or Webflow (for client request workflows), or a Slack message in a designated channel. Pick the one that fits how your team actually operates, not the one that sounds most sophisticated.
Next, list every tool currently in your content stack. Be thorough here. Include your keyword research tools, your AI writing platform, your CMS, your indexing tools, your project management system, and your team notification channels. If a tool touches your content at any point, it belongs on this list.
Now sketch the data flow between each tool. This is the most important part of the mapping exercise. Ask yourself: what specific information needs to pass from one tool to the next? At minimum, your workflow will need to carry the target keyword, the content type (listicle, how-to guide, explainer), the target audience, any internal linking targets, the published URL, and the publish status. If any of these fields are missing at a handoff point, the downstream step will either fail or produce low-quality output.
Think carefully about your content types here. How-to guides, listicles, and explainers follow predictable structures that AI tools handle well. Opinion pieces and original research typically need more human involvement. You may need slightly different Zap structures for each content type, so note that in your map now rather than discovering it mid-build.
Common pitfall: Skipping this mapping step and jumping straight into Zapier leads to broken workflows, missing data fields, and wasted time rebuilding Zaps from scratch. Twenty minutes of planning saves hours of debugging.
Success indicator: You have a written or visual map showing every step from content idea to published and indexed article, with the specific data fields that travel between each step clearly labeled.
Step 2: Configure Your Trigger — The Engine That Starts Everything
Your trigger is the event that wakes up your entire workflow. Getting it right means your automation fires at exactly the right moment with exactly the right data. Getting it wrong means either nothing fires or everything fires at once, including test rows and incomplete records.
Choose your trigger type based on how your team manages content requests. Google Sheets "New Row" triggers work well for keyword-driven workflows where a team member or SEO tool adds a new keyword to a spreadsheet. Schedule by Zapier works well for teams that publish on a fixed cadence, such as three articles per week every Monday, Wednesday, and Friday. Typeform or Webflow form submissions work well for agencies receiving content briefs from clients through a structured intake form.
Whichever trigger you choose, configure it to capture all the fields your downstream steps will need. At minimum, your trigger should collect the target keyword, content type, target audience, internal linking targets, desired word count, and any GEO or AI visibility goals. If a field is not captured at the trigger stage, you will have to add it manually later, which defeats the purpose of automation.
Immediately after your trigger, add a Zapier Filter step. This is non-negotiable. Without a filter, every row added to your spreadsheet, including test rows, incomplete entries, and rows you are not ready to process, will fire the full workflow. Set your filter to only continue when a specific field meets your criteria.
The cleanest approach is to add a "Status" column to your trigger sheet with values like "Ready," "Draft," and "Published." Configure the filter to only continue when Status equals "Ready." This gives your team full control over when a piece of content enters the automated pipeline. Someone can add a keyword row, work on the brief, and only flip the status to "Ready" when every field is complete and the content is approved to move forward.
For agencies: Set up separate Zaps per client rather than trying to handle multiple clients in a single workflow. Use distinct Google Sheets tabs or separate sheets entirely, and filter by a "Client" field to keep content briefs, credentials, and publishing destinations completely isolated. Cross-contaminating client workflows is a risk you do not want to take.
Success indicator: Your trigger fires correctly with a test row that passes all filter conditions, and the data passed to the next step is clean, complete, and correctly formatted.
Step 3: Generate SEO and GEO-Optimized Drafts With Your AI Content Tool
This is where your workflow transforms a keyword and a brief into a full article draft. The quality of what comes out of this step depends almost entirely on the quality of what goes in, so structured data and clear instructions matter here more than anywhere else in the pipeline.
Use Zapier's Webhooks step or a native integration to send your content brief to your AI writing platform. Platforms like Sight AI support automated content generation through 13+ specialized AI agents optimized for both SEO and GEO. You can trigger article generation via webhook, passing a structured payload that includes everything the AI needs to produce a high-quality draft.
Your webhook payload should include, at minimum, the target keyword, article type, target word count, target audience, internal linking targets, and any brand voice instructions. The more context you pass, the better the output. Think of it like briefing a freelance writer: a vague brief produces generic content, and a detailed brief produces something your team can actually use.
GEO optimization is especially important at this stage. Your AI content tool should generate articles structured to be cited by AI models like ChatGPT, Claude, and Perplexity, not just ranked by Google. This means clear headings, direct answers to specific questions, well-structured lists, and authoritative language that AI models are more likely to surface in their responses. If your AI writing platform does not optimize for GEO alongside traditional SEO, you are leaving a significant discovery channel on the table.
Include your internal link targets in the brief payload so the AI agent can weave them naturally into the draft. Adding internal links manually after the fact is time-consuming and easy to forget. When the AI has the targets from the start, internal linking becomes part of the draft rather than an afterthought.
After your AI tool returns the draft, add a Zapier Formatter step to clean and standardize the content before passing it downstream. Use Formatter to strip unwanted characters, standardize title formatting, trim excess whitespace, and ensure the meta description is within your preferred character range. This small step prevents formatting issues from surfacing in your CMS later.
Common pitfall: Sending vague prompts to your AI tool produces generic, low-value content. Always include keyword context, audience intent, and article structure in your payload. The more specific your brief, the more usable your draft.
Success indicator: Your AI tool returns a complete draft including a title, structured headings, body content, and a meta description, all ready for review or direct publishing without significant manual cleanup.
Step 4: Route the Draft Through Review or Straight to Publishing
Not every piece of content should go straight from AI generation to live publication. Some workflows benefit from a human review step. Others are high-volume, trusted pipelines where auto-publishing makes sense. Zapier's Paths feature lets you handle both scenarios within a single workflow using conditional branching.
Set up two paths based on a field in your trigger data. A "Review Required" value routes the draft to your editorial team for sign-off. An "Auto-Publish" value sends it directly to your CMS. You can make this decision at the trigger stage by adding a "Publish Mode" field to your Google Sheet, giving your team control over which path each piece of content takes.
For the human review path, use Zapier to post the draft to a dedicated Slack channel with the title, keyword, and a link to the full content in a Google Doc or Notion page. Your editor reviews it, makes any changes, and then manually updates the Status field to "Approved," which triggers a second Zap that handles the actual publishing step. This keeps humans in the loop without requiring them to manage the logistics of moving content between tools.
For the auto-publish path, connect directly to your CMS using Zapier's native integrations or a Webhooks step. WordPress, Webflow, Ghost, and most modern CMS platforms expose REST APIs that Zapier can write to. Map your content fields carefully: title, body content, slug, meta description, featured image URL, categories, tags, and publish status all need to land in the right fields.
Here is an important safety recommendation: even in auto-publish workflows, set the initial publish status to "Draft" rather than "Published." This gives you a buffer to catch any formatting issues or unexpected AI output before content goes live. You can then set up a second scheduled Zap that flips drafts to "Published" after a short delay, giving your team a window to intervene if something looks wrong.
Success indicator: Articles appear in your CMS with correct formatting, all metadata populated, internal links intact, and the correct publish status applied based on the path the content took.
Step 5: Trigger Automatic Indexing So Search Engines Discover Your Content Fast
Publishing content is not the same as getting it discovered. Without active indexing, a new article can sit undetected by search engines for days or even weeks. This is one of the most overlooked steps in content workflows, and it is also one of the easiest to automate.
After your CMS confirms a successful publish, use Zapier to extract the new article URL from the CMS response and send it to your indexing tool via webhook. Sight AI's indexing tools integrate with IndexNow, an open protocol supported by Microsoft Bing, Yandex, and other search engines that allows publishers to notify search engines of new or updated URLs in near real-time. Instead of waiting for search engine crawlers to find your content on their own schedule, IndexNow tells them it exists immediately.
Configure this step to trigger automatically as part of the same Zap that handles publishing, or as a separate Zap triggered by a status change in your tracking sheet. Either approach works. What matters is that indexing submission happens within minutes of publishing, not hours or days later.
In addition to IndexNow submission, trigger an automated sitemap update so the new URL is included in your XML sitemap immediately after publishing. Many CMS platforms handle this automatically, but if yours does not, Zapier can call a sitemap regeneration endpoint or update a sitemap file directly. A current sitemap reinforces your indexing submission and helps crawlers understand the structure of your site.
Log every indexing submission back to your tracking spreadsheet. Use a Zapier step to write the submitted URL and the submission timestamp to a dedicated "Indexing Log" sheet. This gives you a complete audit trail of what was published, when it was submitted for indexing, and whether the submission was confirmed. It also makes it easy to identify any URLs that may have slipped through without being submitted.
To verify that indexing is working, check Google Search Console's URL Inspection tool for submitted URLs within 24 to 48 hours. In many cases, IndexNow-submitted URLs are discovered significantly faster than URLs left for organic crawling.
Success indicator: Your indexing tool confirms the URL was submitted successfully, the URL appears in your tracking log with a timestamp, and URL Inspection in Google Search Console shows the page as discovered within 24 to 48 hours of submission.
Step 6: Monitor AI Visibility and Feed Insights Back Into the Workflow
Publishing and indexing are not the end of the workflow. They are the beginning of a feedback loop. The most powerful version of a Zapier AI content workflow is a closed-loop system where the results of published content inform what gets created next. AI visibility monitoring is the mechanism that closes that loop.
AI models like ChatGPT, Claude, and Perplexity are increasingly the first point of research for many queries. When someone asks one of these models a question in your niche, is your brand being mentioned in the response? If not, you have a discovery gap that traditional search rankings alone will not reveal. This is why AI visibility monitoring is a distinct and necessary layer on top of conventional SEO analytics.
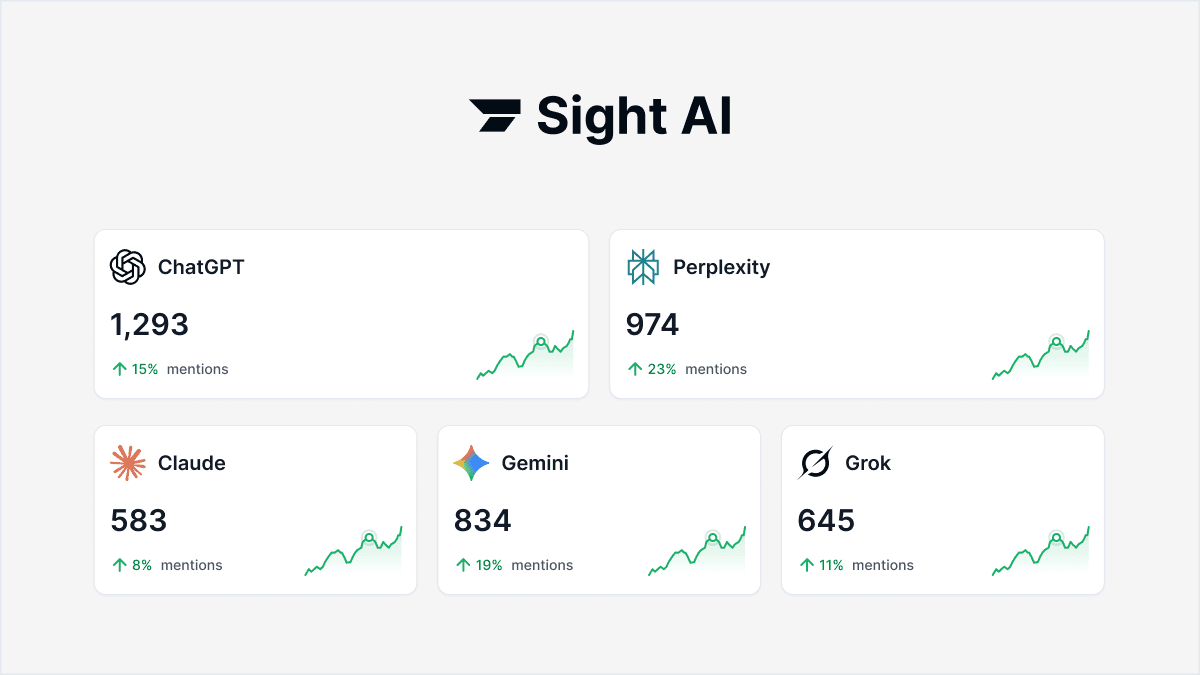
Use Zapier to pull AI visibility data from your tracking platform on a scheduled basis. Sight AI monitors how AI models mention your brand and content across 6+ platforms, providing an AI Visibility Score along with sentiment analysis and prompt tracking. Set up a Zap that runs weekly, retrieves your latest visibility metrics, and logs them to a dashboard or sends a summary to your team's Slack channel.
Configure alerts for significant changes. If your AI Visibility Score drops, or if sentiment around your brand shifts in a particular AI model's responses, you want to know immediately rather than discovering it during a monthly review. A Zapier alert triggered by a threshold condition in your tracking data keeps your team informed in real time.
The most valuable output of this monitoring step is content gap identification. Use your prompt tracking data to find queries where AI models are not mentioning your brand, or where competitors are being cited instead of you. These gaps represent direct content opportunities. Add them to your trigger spreadsheet with a Status of "Ready" and watch them flow through your automated pipeline to become new articles.
This creates the closed-loop system that makes the entire workflow compound over time: publish, index, monitor AI mentions, identify gaps, create new content, repeat. Each cycle produces more content, more AI visibility, and more organic discovery, without proportionally increasing the manual work required from your team.
Success indicator: Your team receives weekly AI visibility reports automatically, sentiment shifts trigger immediate alerts, and your content opportunity queue is populated with data-driven targets rather than guesswork.
Your Complete Workflow at a Glance
You now have the blueprint for a complete, end-to-end Zapier AI content workflow. Here is a quick-reference checklist to confirm every piece is in place before you go live.
Step 1 — Map your pipeline: Document every tool, every data field, and every handoff point before opening Zapier.
Step 2 — Configure your trigger: Set up your Google Sheet, form, or schedule trigger with a Status filter so only approved content enters the pipeline.
Step 3 — Connect your AI content generator: Send a structured brief via webhook and use Formatter to clean the output before passing it downstream.
Step 4 — Route through review or auto-publish: Use Zapier Paths to branch between human review and direct CMS publishing, with Draft status as your safety net.
Step 5 — Trigger indexing automatically: Submit every published URL to IndexNow immediately after publishing and log every submission with a timestamp.
Step 6 — Monitor AI visibility and close the loop: Pull weekly visibility reports, alert on sentiment changes, and feed content gaps back into your trigger sheet.
Running all six steps manually across separate tools is possible, but it is slow and fragile. The right platform makes this significantly simpler by combining AI visibility tracking, SEO and GEO-optimized content generation, and automated indexing in one place, reducing the number of Zaps you need to maintain and the number of integration points that can break.
If you are ready to see exactly where your brand appears across ChatGPT, Claude, Perplexity, and other AI platforms, and to build the content strategy that gets you mentioned more often, Start tracking your AI visibility today and see exactly where your brand appears across top AI platforms.