When Googlebot can't properly crawl your pages, those pages don't rank. It's that simple. The frustrating part is that crawl failures are often invisible: your site looks perfectly fine in a browser, your analytics show normal session data, and yet your pages quietly disappear from search results because Google never saw what you thought it saw.
A Googlebot test removes that guesswork entirely. By simulating how Google's crawler actually fetches and renders your pages, you get ground truth: what content is visible, what resources are blocked, and whether your indexing signals are pointing in the right direction.
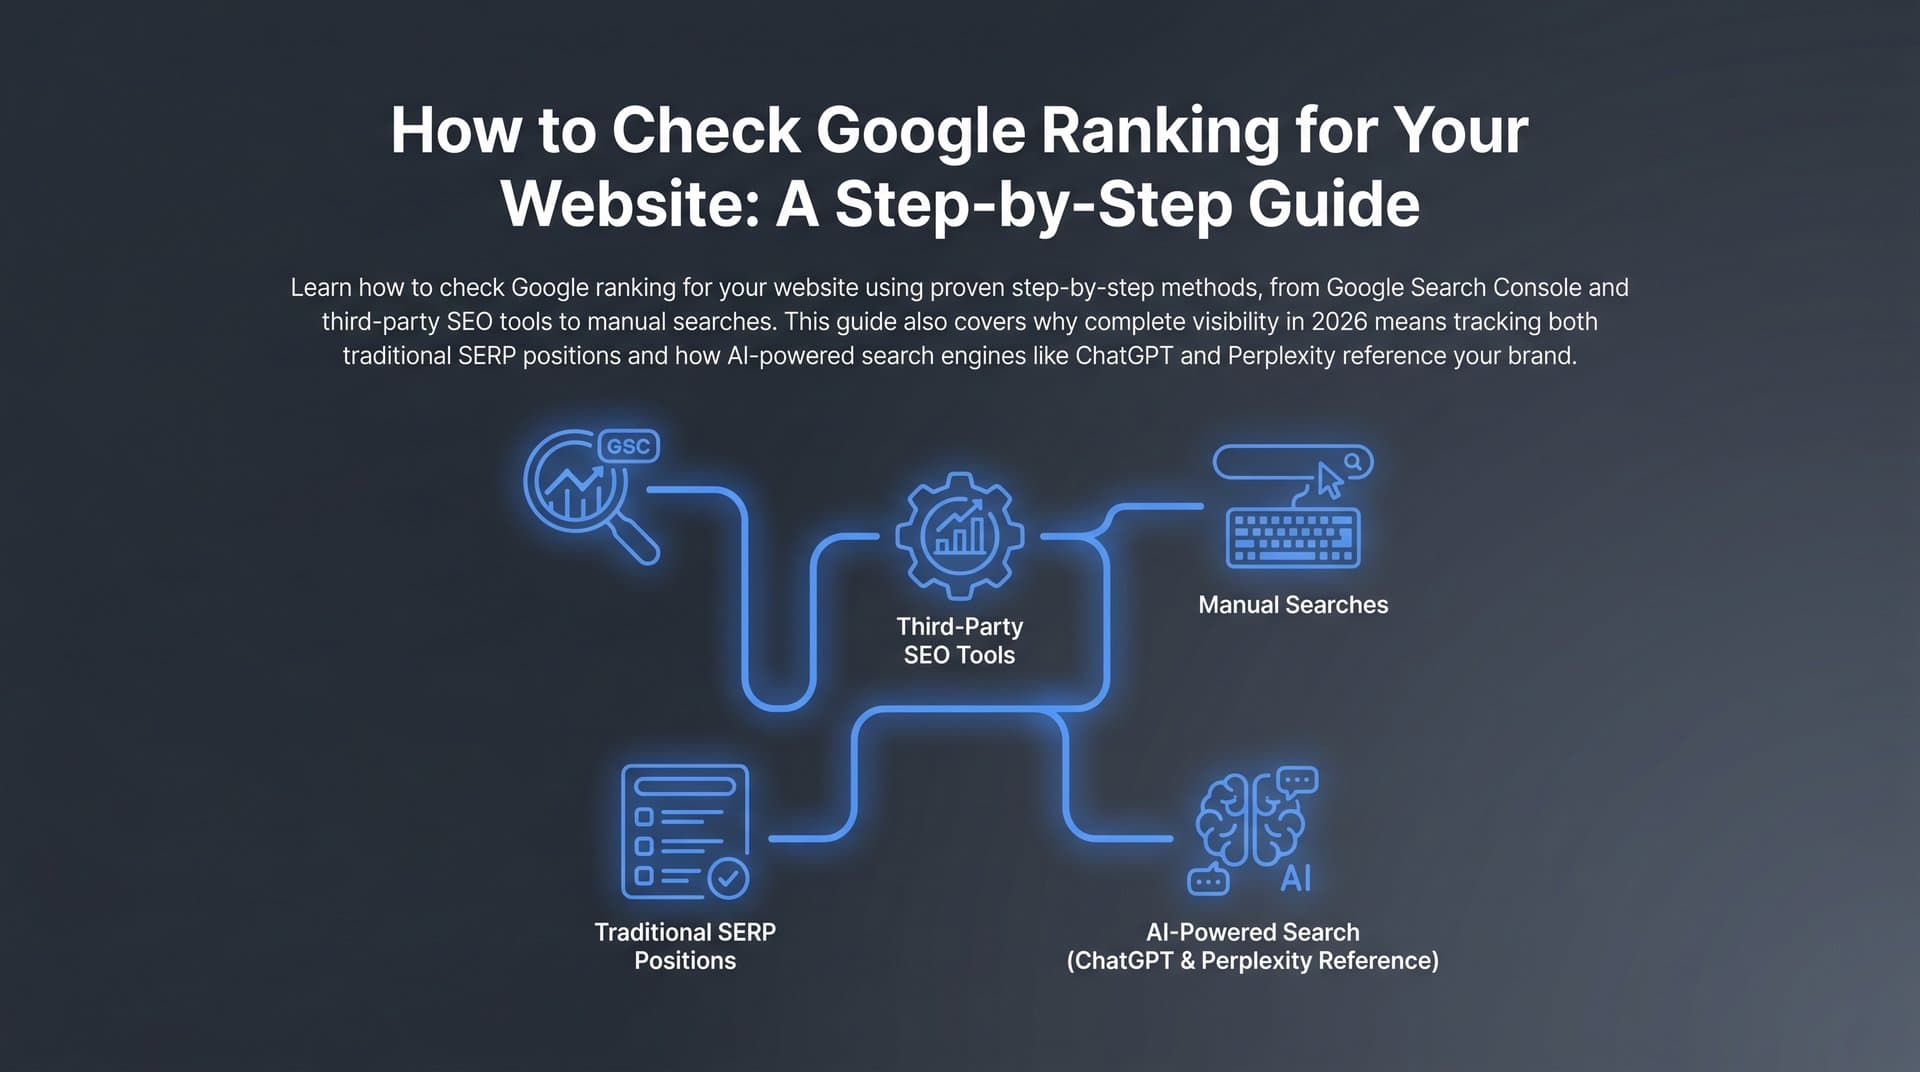
This guide walks you through the complete process using Google Search Console's URL Inspection tool, which is the official, free method for running a Googlebot test on any page. You'll learn how to fetch and render URLs, interpret the crawl report, resolve the most damaging blockers, and confirm your fixes actually worked.
Whether you're a marketer troubleshooting a sudden ranking drop, a founder auditing a new site before launch, or an agency running technical SEO checks for clients, this process applies directly to your situation. The steps are the same; only the scale changes.
By the end, you'll also understand how Googlebot testing connects to a broader indexing and AI visibility strategy. Pages that aren't indexed by Google can't be referenced by AI models like ChatGPT or Perplexity either, which means a clean crawl foundation is now a prerequisite for visibility across every search surface, not just traditional Google results.
Let's get into it.
Step 1: Access URL Inspection in Google Search Console
Before you can run a Googlebot test, you need to be in the right place. Open Google Search Console and make sure you're working within the correct property for the site you want to test.
This sounds obvious, but it's a genuinely common mistake. If your site is set up as both a domain property (example.com) and a URL-prefix property (https://www.example.com), the data and tools are scoped differently. For Googlebot testing, either property type works, but you need to confirm that the URL you're about to test actually belongs to the property you've selected. Testing a URL from the wrong property returns an error and wastes your time.
Once you're in the correct property, locate the URL Inspection tool in the left sidebar. It sits near the top of the navigation, and you can also access it by clicking directly into the search bar at the top of the Search Console interface.
Enter the exact URL you want to test. Exact means: include the protocol (https://), include or exclude the trailing slash to match how the URL actually exists on your site, and don't add any UTM parameters or query strings unless that's the specific URL you're testing. Small discrepancies here can return different results than you expect.
When the URL loads, you'll see a status panel showing information about that page. This is important to understand: what you're looking at by default is cached data from the last time Googlebot crawled that URL. It reflects Google's current understanding of the page, which may be days or weeks old. This is useful context, but it's not the live test.
The live Googlebot test is what you're here for, and it's triggered separately. Think of the default view as a historical record and the live test as a real-time audit. Both have value, but they answer different questions.
Common pitfall: If the URL Inspection tool returns "URL is not on Google" for a page you believe should be indexed, don't panic yet. That's data, not a verdict. The live test will tell you whether the page is currently accessible to Googlebot, which is the more actionable piece of information.
Success indicator: The tool loads your URL and displays a status panel with indexing information. You can see the last crawl date and a summary of the page's current status in Google's index.
Step 2: Run the Live URL Test
Now you're ready to actually run the Googlebot test. Click the Test Live URL button in the upper right of the URL Inspection panel. This triggers a real Googlebot fetch in real time, not a replay of cached data. Google is literally sending its crawler to your URL at that moment.
Before the results come back, it's worth understanding the two Googlebot variants you may encounter: Googlebot Smartphone and Googlebot Desktop. Since Google moved to mobile-first indexing, the smartphone variant is what Google primarily uses to crawl and index your content. That means Googlebot Smartphone should be your default testing choice for most pages. Use Googlebot Desktop only if you're specifically investigating a rendering discrepancy between mobile and desktop experiences, or if your site explicitly serves different content to different user agents.
The test typically takes between 10 and 30 seconds to complete. Don't navigate away from the page during this window. If you do, you'll lose the results and need to rerun the test.
Once the test completes, you'll see results organized across three core tabs:
Page Availability: This tells you whether Googlebot was able to reach the URL at all. A successful fetch here means the server responded with a 200 status code. This tab also surfaces HTTP errors, redirect chains, and server-side blocks that prevent Googlebot from accessing the page.
Page Resources: This lists every resource Googlebot attempted to load while rendering your page: CSS files, JavaScript bundles, images, fonts, and third-party scripts. Resources that were blocked or failed to load appear flagged here. This tab is where many rendering problems originate.
Screenshot: This is the visual render of your page as Googlebot sees it. It's generated from the same Chromium-based rendering engine Google uses, so it reflects what the crawler actually processed, not what a human browser would display.
One clarification worth making: when the test returns "URL is available to Google," that means Googlebot can access and render the page. It does not mean the page is currently indexed or that it will be indexed. Availability is a prerequisite for indexing, but it's not the same thing. You'll verify indexation status in a later step.
Tip: If your results seem inconsistent with what you expect, run the test a second time. Live tests occasionally reflect transient server states: a slow response, a temporarily unavailable resource, or a brief CDN hiccup. Two consistent results give you much higher confidence than one anomalous one.
Success indicator: The test completes, a rendered screenshot is visible in the results panel, and the Page Availability tab shows a successful fetch with a 200 status code.
Step 3: Analyze the Rendered Screenshot and HTML
The screenshot tab is where your Googlebot test becomes genuinely diagnostic. This is Googlebot's actual view of your page, and it often reveals problems that are completely invisible to human visitors.
Start with a visual scan. Does the page look roughly as you'd expect? Are images loading? Is the navigation present? Are your main content sections visible? Look specifically for blank areas, missing sections, or layouts that appear broken or incomplete. Any of these can indicate that Googlebot failed to load resources required for rendering.
The most common and damaging issue you'll spot here is JavaScript-dependent content that didn't render. If your site is built on React, Vue, Angular, or any other client-side framework, there's a real possibility that Googlebot is seeing a much thinner version of your page than your users are. Google does execute JavaScript during rendering, but it uses a version of Chromium that may lag behind the latest browser capabilities, and rendering is resource-constrained. Dynamic content loaded after the initial page load is particularly vulnerable.
After reviewing the screenshot, switch to the More Info tab and examine the rendered HTML. This is the actual markup that Googlebot processed. You're looking for several specific things:
Primary keyword presence: Is your target keyword visible in the rendered HTML? If it only appears in JavaScript-generated content that didn't render, Googlebot may not be associating that keyword with your page.
Headings structure: Are your H1, H2, and H3 tags present in the rendered output? These carry significant weight for topical relevance signals.
Meta title and description: Confirm these appear correctly in the rendered HTML. A misconfigured meta tag that's injected via JavaScript may not be processed as expected.
Structured data: If you've implemented schema markup, verify it appears in the rendered HTML. Schema that exists in your page source but doesn't survive rendering won't be processed by Google's structured data parser.
The comparison to make here is between the rendered HTML and your page's raw source (which you can view by right-clicking in your browser and selecting "View Page Source"). Discrepancies between the two are your signal that client-side rendering is affecting what Googlebot sees. If your page source contains placeholder divs and your rendered HTML contains rich content, that's actually a good sign. If the reverse is true, you have a problem.
Common pitfall: Many site owners assume that because a page looks correct in their browser, Googlebot sees the same thing. This assumption is especially dangerous for JavaScript-heavy sites. The screenshot tab is the only reliable way to verify this, and it's frequently where significant ranking issues originate.
Success indicator: The rendered HTML contains your target content, primary headings, meta tags, and structured data. The screenshot shows a complete, visually coherent page without blank sections or missing content areas.
Step 4: Identify and Resolve Blocked Resources
Open the Page Resources tab. This is a complete list of every external resource Googlebot attempted to load while rendering your page. Each resource shows its URL, type (CSS, JavaScript, image, font), and whether it loaded successfully or was blocked.
Resources marked as blocked are your immediate priority. In the vast majority of cases, blocked resources are blocked by your robots.txt file. Someone, at some point, added a Disallow rule that prevents Googlebot from accessing that file, and the consequence is that your page can't render correctly.
This is one of the most historically common technical SEO mistakes. Early SEO advice sometimes recommended blocking CSS and JavaScript files from Googlebot to conserve crawl budget. That advice is outdated and actively harmful. Google's official guidance is clear: allow Googlebot to access all resources needed to render your pages. Blocking your main CSS bundle, for example, means Googlebot renders a completely unstyled version of your page, which can affect how content is interpreted and which elements are considered primary.
To investigate, navigate directly to your robots.txt file by visiting yourdomain.com/robots.txt in your browser. Look for Disallow rules that match the paths of your blocked resources. Common culprits include:
CSS and JavaScript directories: Rules like Disallow: /assets/ or Disallow: /static/ that inadvertently block entire resource directories.
Specific framework files: Rules targeting files like /wp-includes/ or /wp-content/plugins/ in WordPress environments, which may block rendering-critical scripts.
Third-party scripts: Some third-party resources are hosted on external domains and blocked by those domains' own robots.txt files. You can't control those, but you can note them and assess whether they're critical for rendering.
Before editing your robots.txt, use the robots.txt Tester in Google Search Console (found under Settings) to validate your rules. Test the specific URLs of your blocked resources against the Googlebot user agent to confirm which rules are causing the blocks. Then remove or modify the Disallow rules that are affecting critical rendering resources.
The distinction to keep in mind: not all blocked resources are problems. If Googlebot can't access an internal admin script or a session management file, that's intentional and harmless. The question is whether the blocked resource affects how your page content renders and appears to Googlebot.
Blocked resources also connect to crawl budget efficiency. Every blocked resource represents a failed request during Googlebot's crawl of your page, which adds latency and can affect how thoroughly Google crawls your broader site over time.
Success indicator: No critical CSS or JavaScript files appear as blocked in the Page Resources list. The resources required for your page to render correctly are all returning successful load status.
Step 5: Check Indexability Status and Canonical Signals
A page can be perfectly accessible to Googlebot and still not appear in search results. That's because crawlability and indexability are two different things, and your Googlebot test covers both.
In the URL Inspection results, locate the Coverage section. This tells you the page's current indexing status. The four states you'll encounter most often are:
URL is on Google: The page is indexed. This is the outcome you want.
URL is not on Google: The page is not indexed, and a reason is provided. Common reasons include noindex directives, crawl errors, or Google's determination that the page is a duplicate.
Crawled, currently not indexed: Googlebot has visited the page but chose not to index it. This is typically a content quality or relevance signal, not a technical crawl problem. If you see this status repeatedly after fixing technical issues, the issue is likely the content itself.
Discovered, currently not indexed: Google knows the URL exists (likely from your sitemap or internal links) but hasn't crawled it yet. It's in the queue.
Beyond the indexing status, verify the canonical URL that Googlebot is recognizing for this page. A canonical tag tells Google which version of a page should be treated as the authoritative one. Misconfigured canonicals are a significant source of invisible ranking problems: you may be publishing great content on one URL while all the ranking signals are being directed to a different URL entirely.
Cross-reference the canonical URL shown in the URL Inspection results against the canonical tag in your page's <head> section. They should match. If they don't, Google may be overriding your canonical based on other signals it's detecting.
Also check for conflicting directives. Common conflicts include:
noindex meta tag combined with a canonical: These signals contradict each other and can confuse Google's processing.
X-Robots-Tag headers: These are server-level directives that can override page-level meta tags. If your server is sending a noindex header, it will take precedence regardless of what your HTML says.
Redirect chains: If the URL you tested redirects, the URL Inspection tool will show you the redirect destination. Trace the full chain and confirm the final destination is the page you intend to be indexed. Redirect chains longer than one hop waste crawl budget and can dilute link equity.
Self-referencing canonicals are correct behavior: a page pointing its canonical to itself is standard and expected. The problem arises when a canonical points to a different URL unintentionally, often due to a CMS configuration issue or a template error that applies the wrong canonical across multiple pages.
Success indicator: The canonical URL matches your intended page, there are no conflicting noindex or X-Robots-Tag directives, and the coverage status reflects the indexing state you expect.
Step 6: Request Indexing After Fixes Are Applied
You've run the Googlebot test, identified the issues, and applied your fixes. Now you need to tell Google to come back and look again.
Use the Request Indexing button in the URL Inspection tool. This sends a prioritization signal to Google's crawl queue, indicating that this URL has been updated and should be recrawled. It's the fastest manual method available for prompting a fresh Googlebot visit to a specific page.
Be clear on what this does and doesn't do. It does not guarantee immediate indexing. Google's crawl queue still applies, and the actual recrawl can happen anywhere from minutes to several days after your request, depending on your site's crawl authority and the current queue load. For high-authority sites with frequent content updates, the turnaround is typically faster. For newer or lower-authority sites, it may take longer.
For pages that are part of a larger site update, complement the manual indexing request with an updated XML sitemap submission. In Google Search Console, navigate to the Sitemaps section, confirm your sitemap URL is submitted, and resubmit it if you've made significant structural changes. This helps Google discover not just the specific URL you tested, but all updated pages across the site.
For teams managing multiple sites or publishing at scale, manual indexing requests become a bottleneck quickly. This is where tools like Sight AI's Website Indexing suite add real operational value. Sight AI integrates the IndexNow protocol, which sends instant notifications to multiple search engines simultaneously (including Bing and Yandex) when new or updated content is published. Rather than waiting for Googlebot to rediscover your pages on its own schedule, you're actively pushing discovery signals the moment content goes live. It also handles automated sitemap updates, removing the manual step from your publishing workflow entirely.
After requesting indexing, wait 24 to 48 hours and then rerun the URL Inspection test. Check whether the page now shows as indexed with a recent crawl date. If it does, your fix worked. If the page remains "Crawled, currently not indexed" after multiple requests and confirmed technical fixes, the issue has shifted from a crawl problem to a content quality problem. That requires a different type of intervention: improving the depth, uniqueness, or relevance of the page content rather than its technical accessibility. Understanding how to accelerate page indexing can help you reduce the wait time between publishing and appearing in search results.
Success indicator: Rerunning URL Inspection 48 hours after requesting indexing shows the page as indexed with a crawl date that reflects your recent fix.
Step 7: Build a Repeatable Googlebot Testing Workflow
Running a Googlebot test once is useful. Running it consistently is what separates reactive SEO from proactive SEO. The goal of this final step is to turn what you've just learned into a documented, repeatable process your team can execute without reinventing it each time.
Start by establishing a testing cadence. At minimum, run a Googlebot test after every major site update: CMS deployments, template changes, plugin updates, new page launches, and significant content revisions. These are the moments when crawl issues most commonly appear, because they're the moments when robots.txt rules, canonical configurations, and rendering dependencies are most likely to change unexpectedly.
Build a simple audit checklist your team can work through consistently. A practical version looks like this:
Screenshot review: Does the rendered page look complete? Are there blank sections or missing content areas?
Rendered HTML check: Is the target keyword present? Are headings and structured data visible in the rendered output?
Blocked resources: Does the Page Resources tab show any blocked CSS or JavaScript files?
Canonical verification: Does the canonical URL in the inspection results match the intended canonical in the page's head?
Indexability status: What does the Coverage section show? Is the status what you expect?
Connect your Googlebot testing findings to your broader SEO performance monitoring. When you identify and fix a crawl issue, note the date and the specific fix in your SEO performance dashboard. This creates a timeline that lets you correlate technical changes with ranking movements, which is invaluable for proving the value of technical SEO work to stakeholders.
For agencies, document Googlebot test results per client property as part of your monthly technical SEO reporting. Screenshots of the rendered page, a log of blocked resources found and resolved, and canonical status checks provide concrete evidence of the work done and the issues caught before they became ranking problems.
There's also a dimension here that's becoming increasingly important: AI search visibility. Pages that aren't indexed by Google cannot be referenced by AI models that rely on web-indexed content. ChatGPT, Perplexity, and other AI platforms that surface information from the web depend on that content being discoverable and indexed in the first place. Consistent Googlebot testing isn't just a traditional SEO practice anymore; it's a prerequisite for appearing in AI-generated responses. Tools like Sight AI's AI Visibility tracking let you monitor how your brand is being mentioned across AI platforms, but that tracking only has value if your underlying content is properly indexed and accessible to begin with.
Success indicator: You have a documented testing checklist, a defined testing cadence tied to your publishing schedule, and a log of past test results your team can reference and build on.
Your Complete Googlebot Testing Checklist
Running a Googlebot test is one of the highest-leverage technical SEO actions available to you. It replaces assumptions with evidence, showing you exactly what Google sees rather than what you hope it sees. Here's your quick-reference summary of the full process:
1. Open URL Inspection in the correct Search Console property and enter the exact URL you want to test.
2. Click Test Live URL to trigger a real-time Googlebot fetch, not cached data.
3. Review the rendered screenshot and HTML for missing content, broken layouts, and JavaScript rendering gaps.
4. Check the Page Resources tab for blocked CSS and JavaScript files, and resolve any robots.txt rules causing those blocks.
5. Verify canonical signals and indexability status, and resolve any conflicting directives or redirect chain issues.
6. Request indexing after applying fixes, and rerun the test 48 hours later to confirm the page is indexed.
7. Document the process and build it into your regular publishing and deployment workflow.
Once your pages are crawlable and properly indexed, the next layer of visibility is AI search. Pages that rank well in Google are increasingly the same pages that get cited by AI models, but only if your content is optimized for the way those models surface information. That's where the technical foundation you've just built becomes the starting point for a broader content visibility strategy.
Sight AI helps you track exactly how your brand appears across AI platforms like ChatGPT, Claude, and Perplexity, and generates SEO and GEO-optimized content designed to increase your chances of being cited in AI-generated responses. Start with a clean crawl foundation, then build the content strategy that earns visibility everywhere it matters. Start tracking your AI visibility today and see exactly where your brand appears across top AI platforms.