Optimizing your images is about more than just making them look good. It's a technical discipline that hits on everything from site speed and user experience to how well search engines can actually understand what your content is about. Done right, it means compressing files, using smart filenames and alt text, and picking modern formats like WebP to give both users and search crawlers what they want.
Why Image Optimization Is Crucial for Your SEO Success
Let's be clear: image optimization isn't some minor task you can afford to ignore. It’s a core piece of any serious SEO strategy. Your website's visuals are often the heaviest, most data-intensive parts of a page. When they aren't optimized, they're like dead weight, dragging down your load times and sending visitors running for the back button.
This slowdown has a direct, measurable impact on how Google sees and ranks your site.
The relationship between images, speed, and happy users is impossible to miss. Bloated, unoptimized images slow everything down, and slow load times are a proven conversion killer. In fact, Google’s own research found that a staggering 53% of users will ditch a website if it takes longer than 3 seconds to load. Since images are usually the biggest culprits, fixing them can speed up a site by as much as 25%. That’s a huge difference that can slash your bounce rate and keep people engaged.
The Impact on Core Web Vitals and User Experience
Google isn't guessing when it measures user experience. They use a specific set of metrics called Core Web Vitals to score your page on loading performance, interactivity, and visual stability. Large, heavy images absolutely hammer these scores, especially the Largest Contentful Paint (LCP), which measures how fast the main, most important content on the page appears.
A poor LCP score is a direct signal to Google that your page delivers a slow, frustrating experience. This can quietly kill your rankings, pushing you down the search results even if the rest of your content is top-notch. On the flip side, crisp images that load instantly create a smooth, professional feel, encouraging people to stick around. That positive engagement tells search engines your content is worth showing to more people. This synergy between user experience and technical performance is something we explore deeply in our guide on content SEO best practices.
More Than Just Speed: A Deeper Look
But it's not all about performance. Smart image optimization also gives search engine crawlers the context they desperately need. To a machine, an image is just a bunch of pixels without a label. When you use descriptive filenames and thoughtful alt text, you're translating your visuals into a language Google can read and understand.
This context helps your images show up in Google Images search, opening up a whole new channel for organic traffic. It also reinforces the topic of the page itself, making your entire article stronger from an SEO perspective. Ultimately, getting your images right is a critical part of any strategy designed to outrank SEO competitors and dominate search rankings.
Just look at how Google itself advises webmasters on sitemaps—a key tool for helping search engines find all your content, including your images.
The official documentation makes it clear: you need to give search engines a clean, easy path to discover and understand every part of your site. When it comes down to it, optimizing your images is one of the highest-impact changes you can make for both your search visibility and the people visiting your website.
Choosing the Right Image Format and Dimensions
Before you touch compression tools or even think about alt text, your first big win in image optimization happens right at the start: picking the right format and size.
Nailing these two fundamentals sets the stage for a lightning-fast site and saves you from a world of performance headaches later. It’s the difference between your website sprinting with a lightweight backpack versus trying to run a marathon with a bag of bricks strapped to its back.
Each image format is a tool built for a specific job. If you pick the wrong one, you end up with bloated file sizes or fuzzy, low-quality visuals—and both are poison for user experience and SEO.

Think of it this way: you wouldn't use a sledgehammer to hang a picture frame. So why use a massive PNG for a simple photograph? Getting this choice right from the jump is a massive step toward mastering how to optimize images for SEO.
Selecting the Best Image Format for the Job
Let's cut through the jargon and talk about which format to use and when. This isn't a textbook definition list; it's a practical guide for people who need to get things done.
To make the decision easier, here's a quick comparison of the formats you'll encounter most often.
Comparing Common Image Formats for Web Use
A practical comparison to help you choose the best image format based on use case, quality, and compression efficiency.
| Format | Best For | Key Feature | SEO Consideration |
|---|---|---|---|
| WebP | Nearly all web images (photos, banners, product shots) | Excellent compression, supports transparency, widely supported | Default choice for performance. Smaller files lead to faster load times. |
| SVG | Logos, icons, simple illustrations | Infinitely scalable, code-based, tiny file sizes | Perfect for brand assets. Ensures crisp visuals on all devices. |
| JPEG | Photographs, images with complex colors | Good compression for photos, universal compatibility | A reliable fallback, but WebP often delivers smaller files. |
| PNG | Images requiring high-quality transparency | Lossless quality with transparency support | Use sparingly; files are significantly larger than WebP or JPEG. |
In short, your workflow should look something like this:
- WebP: This is your new best friend. Developed by Google, WebP hits the sweet spot between quality and file size. It often creates files 25-34% smaller than an equivalent JPEG while also supporting transparency like a PNG. For hero images, blog visuals, and most graphics, WebP should be your default choice.
- SVG: These aren't pixel-based; they're made of code. That means they're perfectly sharp at any size and have incredibly small file sizes. SVGs are non-negotiable for logos, icons, and any simple vector graphics.
- JPEG: The old workhorse. Still great for photos if you need to support ancient browsers, but WebP almost always beats it on compression.
- PNG: Its only real job on a modern website is for images that need a transparent background where WebP isn't an option for some reason. The trade-off is a much larger file.
Key Takeaway: Default to WebP for almost every photographic image. Use SVG for all logos and icons. Only use JPEG as a fallback for compatibility, and PNG when high-quality transparency is a must-have.
Getting Image Dimensions Right from the Start
Just as critical as the format are the image's dimensions—its width and height in pixels.
One of the most common performance mistakes is uploading a massive, 5000-pixel-wide photo straight from a camera and just letting the browser shrink it. This forces every visitor to download a giant file, wasting their data and bogging down your page load speed.
Every single unnecessary byte impacts your site's performance and crawlability. If you want to dive deeper into how site speed affects search visibility, our guide on crawl budget optimization at https://www.indexpilot.ai/blog/crawl-budget-optimization explains how to make your site more efficient for Googlebot.
The fix is simple: build a workflow to size your images correctly before they ever get uploaded.
Find out the maximum width your images will ever need to be. For a full-width hero image, that might be 1920 pixels. For an image inside your blog's content column, it might only be 800 pixels.
For e-commerce sites, getting this right is even more crucial. A guide on Shopify home page image size optimization strategies offers some great platform-specific advice for making sure product shots are crisp but never oversized.
Here’s a quick checklist to follow:
- Find the container size: Use your browser's "Inspect" tool to see the maximum width an image will be displayed at on your site. Just right-click the area and see what the CSS says.
- Resize before you upload: Open the image in Photoshop, Affinity Photo, or a free online tool and resize it to that maximum width. Don't let your CMS do the heavy lifting.
- Plan for high-density screens: To keep images looking sharp on Retina displays, a great rule of thumb is to save them at 2x the display size. So, if your content column is 800px wide, you'd upload an image that's 1600px wide. This is where
srcset, which we'll cover next, comes in to deliver the right size to the right device.
By locking in the right format and dimensions from the get-go, you've already solved two of the biggest performance killers. You're building your optimizations on a solid foundation.
Getting Image Compression Right Without Losing Quality
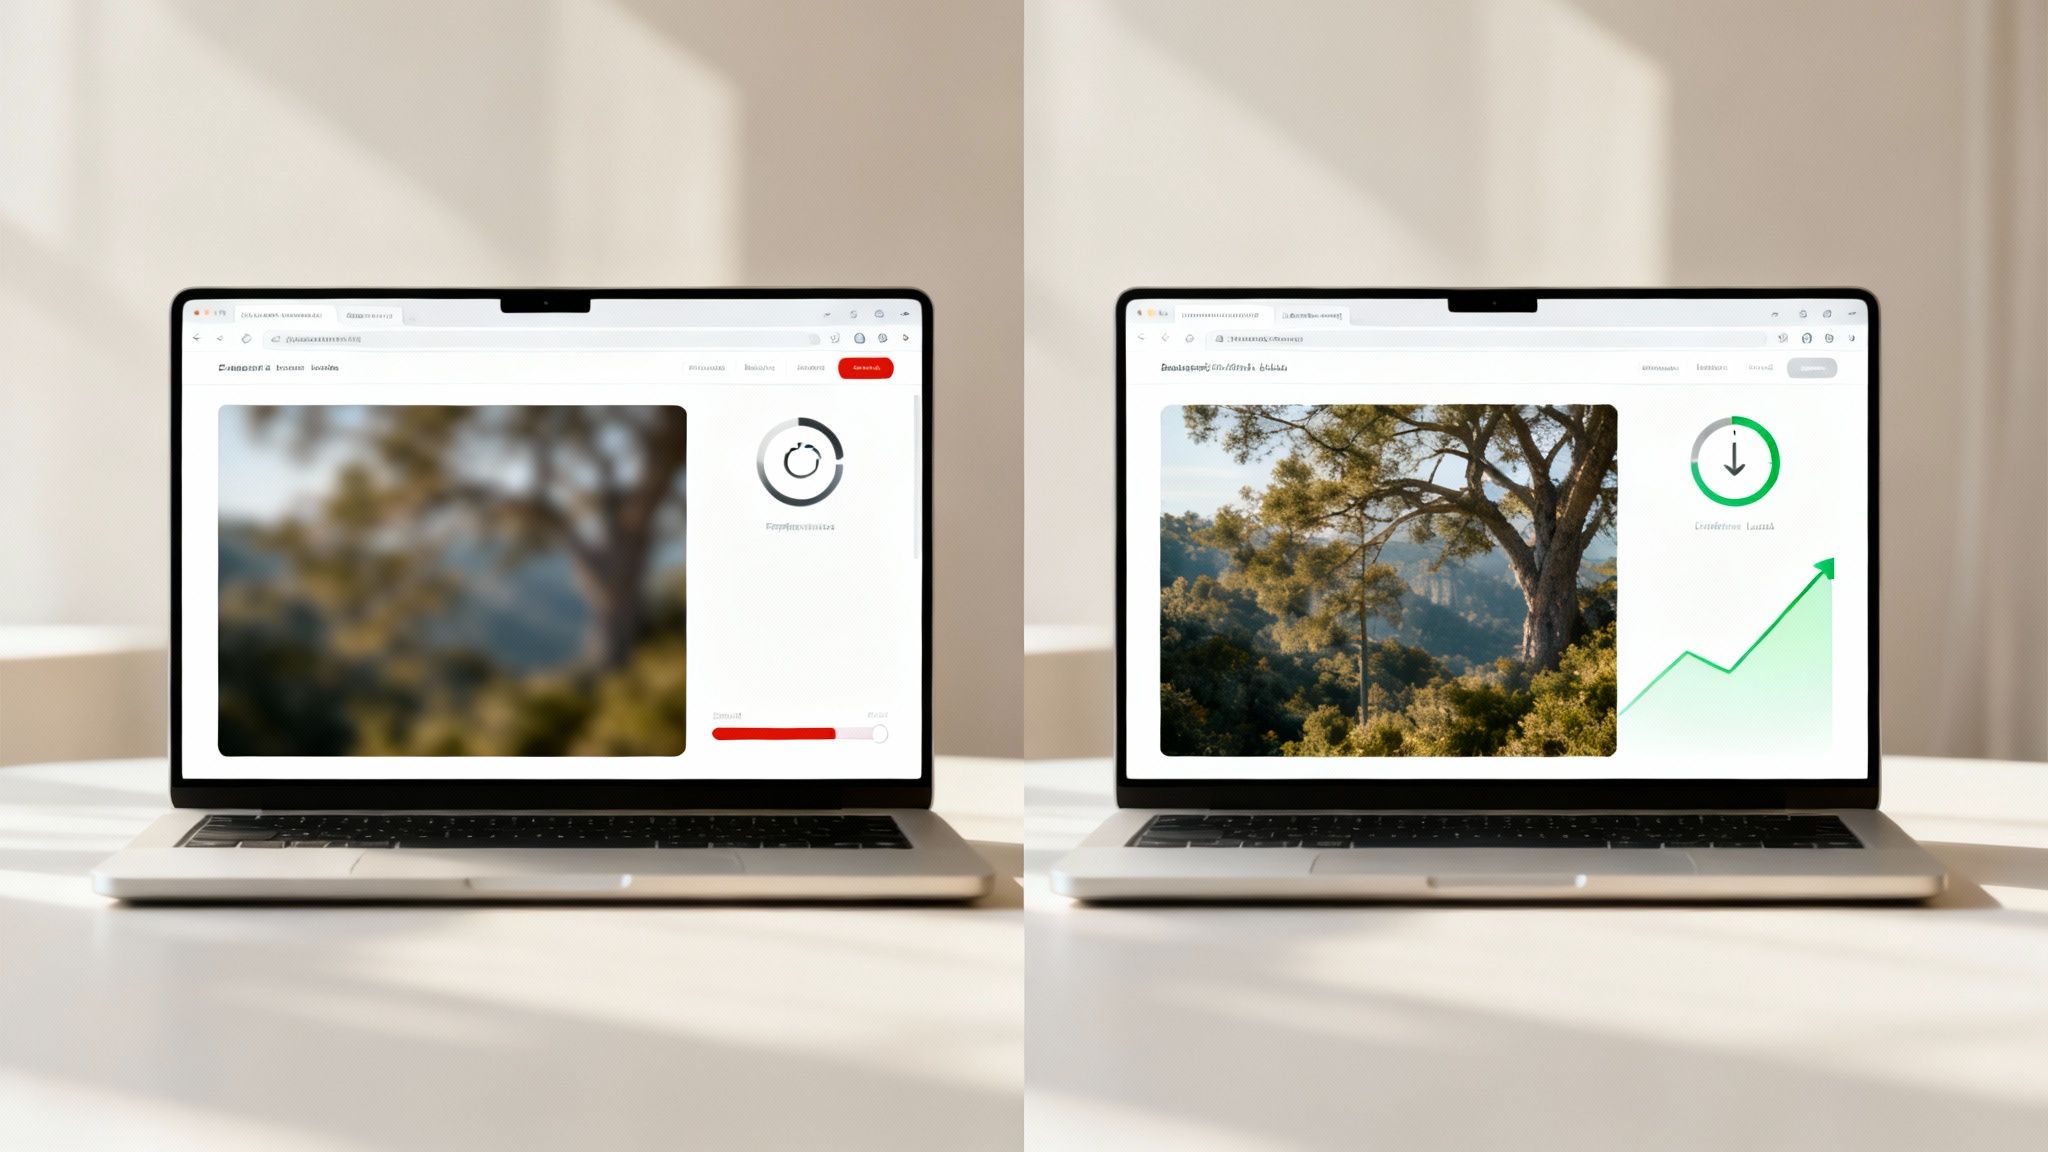
Once you've picked the right format and dimensions, the next big win is compression. This is where the magic happens—using smart algorithms to shrink your image’s file size so it downloads in a flash.
The whole game is to make the file as small as possible without your visitors ever noticing a drop in visual quality. It's a bit of a balancing act, but nailing it is absolutely fundamental for image SEO. You're essentially stripping out redundant data to lighten the load, which directly boosts your page speed—a massive signal for both users and Google.

This step alone can take a clunky 5MB photo and slim it down to a lean, fast-loading file under 150KB.
Lossy vs. Lossless: What's the Difference?
You'll hear two terms thrown around: "lossy" and "lossless." Understanding which one to use is key to building an efficient workflow.
Lossless compression is exactly what it sounds like. It reorganizes the image data more efficiently without throwing any of it away. The final image is a perfect pixel-for-pixel reconstruction of the original.
- The upside: No quality is lost. Ever.
- The downside: The file size reduction is pretty tame. It’s often not enough of a cut for web performance.
- Best for: Technical diagrams, screenshots with lots of text, or any image where perfect fidelity is a must-have.
Lossy compression, on the other hand, achieves much bigger savings by permanently deleting some of the data. The algorithms are clever, though; they target information the human eye is least likely to miss, like subtle shifts in color.
- The upside: You get massive file size reductions—often 50-75% or more.
- The downside: Some quality is gone for good. If you get too aggressive, you'll see ugly artifacts like blurriness or pixelation.
- Best for: Pretty much all photos on the web. Blog post images, hero banners, product shots—you name it. The performance boost is just too good to pass up.
For web performance, lossy compression is almost always the right call for photographs. The trick is to find that "sweet spot" where the file is tiny but the quality loss is basically invisible to the naked eye.
My Go-To Tools for Image Compression
You don't need fancy, expensive software for this. Some of the best tools I use every day are free. Having a few solid options in your back pocket makes the whole process quick and repeatable.
Here are the tools I personally use and recommend for different jobs:
- TinyPNG / TinyJPG: My go-to for a quick fix. You just drag and drop your images, and it spits out a highly compressed version. It's perfect when you just need to compress a few images without any hassle.
- ShortPixel: If you run a WordPress site, this plugin is a lifesaver. It can automatically compress new uploads, go back and optimize your entire media library, and even serve up next-gen WebP formats. It's the definition of "set it and forget it."
- Squoosh: This is a powerful, in-browser tool from Google that gives you a ton of control. You can see a live side-by-side preview of your image as you tweak the compression level. It's my choice for important hero images where I need to strike that perfect balance between quality and file size.
- Affinity Photo / Photoshop: For pros who want total control, the "Save for Web" or "Export" functions in these desktop editors are unbeatable. You can fine-tune every single setting and see the results instantly before you commit.
No matter which tool I'm using, I have a couple of hard targets. I aim to get standard content images under 150 KB and larger hero images under 300 KB. Hitting these numbers consistently is all about building a solid workflow.
To see the real impact of your work, it helps to keep an eye on your site's performance over time. Implementing some best practices for SEO performance monitoring will show you exactly how your image optimization is improving Core Web Vitals. This turns a one-off task into a repeatable process that truly moves the needle.
Once you've nailed down the right formats and compression levels for your images, it's time to focus on context. This is where you give search engines and screen readers the crucial information they need to understand what your images are actually about.
This process starts before you even think about hitting the "upload" button.
Every photo you take starts with a generic, forgettable name like IMG_8374.jpg or DSC_0052.png. Honestly, leaving them that way is one of the most common and easily avoidable mistakes in image SEO. Your filename is your very first chance to tell Google what an image contains, transforming a random string of characters into a powerful, keyword-rich signal.
Think of it like labeling a folder on your computer. You'd name a folder "Taxes 2024," not "Folder 1." The logic is exactly the same here.
Writing Filenames That Work for SEO
Crafting a good filename is simple. The goal is to be descriptive and concise while weaving in your target keywords in a way that feels completely natural.
A filename like blue-suede-running-shoes-side-view.jpg is infinitely more valuable to a search engine than IMG_8374.jpg. It instantly communicates that this image is highly relevant for anyone searching for blue running shoes, directly connecting your visual content to what users are looking for.
Here’s a simple mental checklist to run through for every image:
- Start with the subject: What is the main thing in the photo?
- Add key details: Include important descriptors like color, model, or viewpoint.
- Include keywords: If it fits naturally, add your primary or a secondary keyword.
- Format it correctly: Always use lowercase letters and separate words with hyphens (-). Avoid underscores and spaces.
Making this a habit turns every single image you upload from a digital mystery into a small but mighty SEO asset that bolsters the topic of the entire page.
The Critical Role of Alt Text
After you've uploaded your image with a descriptive filename, the next piece of the puzzle is adding alternative text, or alt text. This is, without a doubt, one of the most important parts of on-page image optimization.
Alt text is just a written description of an image, and it serves two vital purposes:
- Accessibility: Screen readers use it to describe the image out loud for visually impaired users, giving them the same context and information someone who can see the image would get.
- SEO: It gives search engine crawlers a clear, text-based explanation of what the image shows, helping them index it accurately for image search results.
Plus, if an image ever fails to load, the browser will display the alt text instead. It’s a fallback that ensures no user, under any circumstance, loses out on important information.
Key Takeaway: Alt text is not optional. It’s fundamental to creating an accessible web experience and a huge signal for search engines. Skipping it means you're ignoring both your users and Google's crawlers.
How to Write Effective Alt Text
Writing good alt text is a skill, but it’s an easy one to learn. The best approach is to be descriptive and specific—just imagine you're describing the image to someone over the phone.
The goal isn't to stuff as many keywords in as possible. While including a relevant keyword is great, the description needs to be accurate and sound natural. The same principles that make for good writing in your main content apply here. For more on that, check out our guide to SEO copywriting best practices.
Let's look at a few examples to make this perfectly clear.
Good vs. Bad Alt Text Examples
| Image Type | Bad Alt Text (Vague or Stuffed) | Good Alt Text (Descriptive and Helpful) |
|---|---|---|
| Product Shot | alt="shoes" |
alt="Pair of blue suede Nike running shoes on a white background" |
| Infographic | alt="chart" |
alt="Bar chart showing a 25% increase in website traffic in Q3 2024" |
| Action Photo | alt="person running" |
alt="Woman with blonde hair running on a paved trail in Central Park" |
| Decorative Image | alt="blue swoosh graphic design element" |
alt="" (Left empty for purely decorative images) |
Pay close attention to that last example. If an image is purely for decoration—like a background pattern or a stylistic divider—and adds zero informational value, the best practice is to leave the alt text empty (alt=""). This tells screen readers to just skip over it, which creates a much cleaner, less cluttered experience for users.
By combining keyword-focused filenames with descriptive, user-centric alt text, you’re delivering a powerful one-two punch of context that dramatically improves how both search engines and people understand your visual content.
Taking Your Image SEO to the Next Level
Once you’ve nailed the fundamentals of descriptive filenames and solid alt text, it’s time to dig into the strategies that truly give your visual content a competitive edge. Moving beyond the basics is what separates a decent image SEO strategy from a truly great one. These next-level techniques are all about delivering a superior user experience and giving search engines richer, more explicit data to understand and rank your content.
This is where you can make some serious gains in performance and visibility, especially for mobile users where every kilobyte and millisecond counts.
Delivering Responsive Images with Srcset
One of the most powerful tools in a modern SEO’s arsenal is the srcset attribute. In plain English, srcset is a bit of HTML code that lets you give the browser a menu of image options at different sizes. The browser then intelligently picks the right version to download based on the user's screen size and resolution.
This solves a massive, common problem. Instead of forcing a small phone to download a huge 1600-pixel-wide image meant for a desktop monitor, srcset ensures it only grabs the small, lightweight version it actually needs. This move alone can dramatically improve your mobile page load times—a huge win for both Core Web Vitals and keeping your visitors happy.
Most modern content management systems, like WordPress, handle this automatically. When you upload an image, the CMS creates several smaller versions behind the scenes and generates the srcset code for you. Still, it's always a good idea to double-check that it’s working correctly using your browser's "Inspect" tool.
Using Schema Markup for Richer Results
Schema markup, also known as structured data, is code you add to your site to give search engines explicit information about your content. When you apply it to images, it can help you earn those eye-catching rich results right on the search engine results page (SERP).
This is an absolute game-changer for certain types of content. For instance:
- Recipe sites: Image schema can help your dish's photo show up as a thumbnail in search, complete with ratings and cooking times.
- E-commerce stores: Product schema can display an image, price, and availability, making your listing far more clickable for shoppers.
- Articles:
NewsArticleorBlogPostingschema lets you specify a featured image, boosting its chances of appearing in the "Top Stories" carousel or on Google Discover.
Basically, implementing schema is like telling Google, "Hey, this isn't just a random image; it's the main photo for this specific product," providing powerful context that helps your visuals stand out from the crowd.
Pro Tip: Google's Rich Results Test tool is your best friend here. Just pop in a URL, and it will show you exactly what structured data it finds and tell you if your page is eligible for rich results.
Creating and Submitting an Image Sitemap
While Google is incredibly good at crawling websites and finding images linked from your pages, it’s not infallible. An image sitemap is a dedicated file that gives search engines a direct roadmap to every important visual on your site, making sure nothing gets overlooked.
This is especially critical for sites where images are the main event, like photography portfolios, e-commerce product catalogs, or any site that uses JavaScript galleries to show off visuals. An image sitemap ensures that even images not easily found through a standard crawl get discovered and indexed.
It all starts with the fundamentals. The basic workflow, as shown below, begins with a descriptive filename and supportive alt text—these are the essential data points that will populate your sitemap and give it meaning.
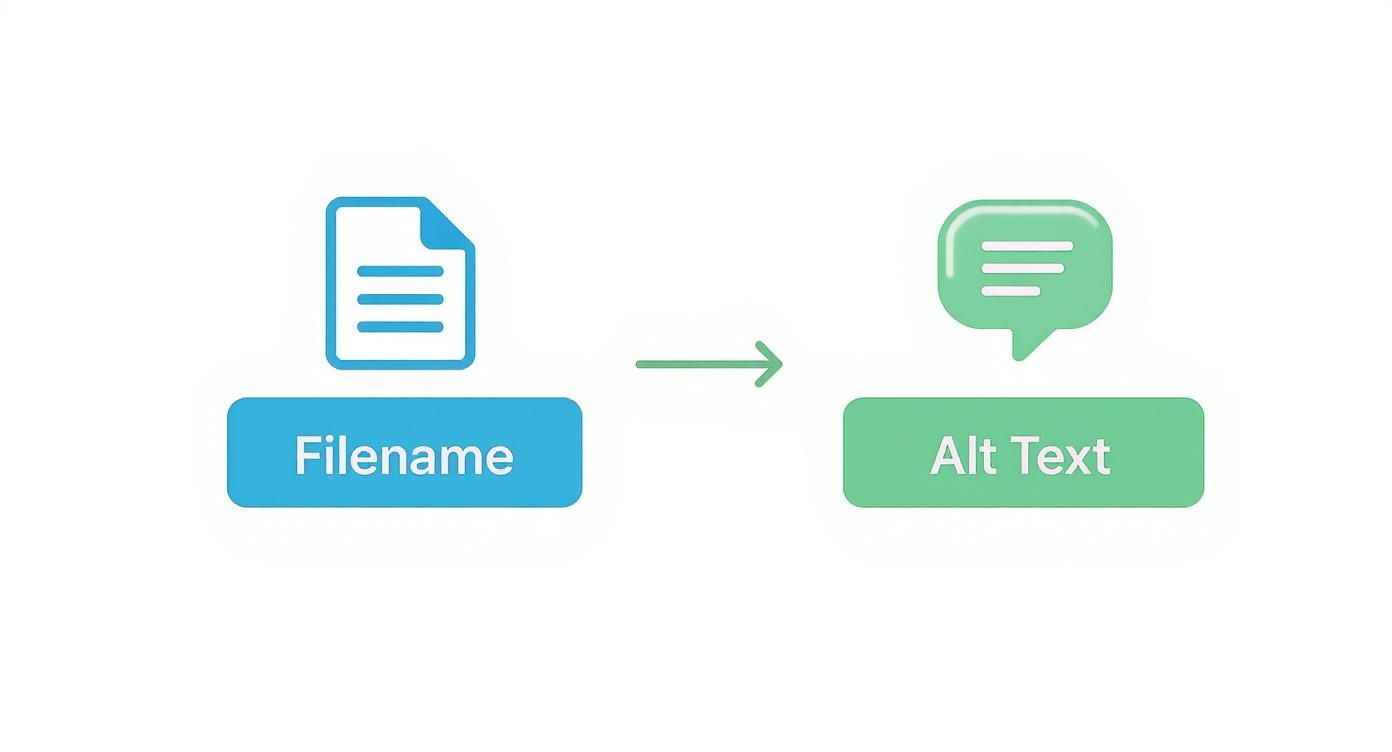
The visualization really drives home the point: providing clear metadata through filenames and alt text is the foundation for giving search engines content they can actually discover and understand.
Creating one is pretty straightforward. You can either generate a separate image sitemap or simply add image information to your existing XML sitemap. For each image URL, you can include extra tags for its title, caption, and even geographic location. Once it's ready, you submit it to Google via Google Search Console just like you would a standard sitemap. To get this right, following these XML sitemap best practices will ensure your file is structured perfectly for maximum impact.
By putting srcset to work for performance, using Schema for rich results, and creating image sitemaps for discovery, you're building a truly comprehensive strategy. You're not just doing "image SEO"—you're optimizing your visual content from every possible angle to drive meaningful traffic and provide a genuinely great user experience.
Answering Your Top Image SEO Questions
As you get the hang of image optimization, a few common questions always seem to pop up. Let's tackle them head-on to clear up any confusion and make sure you're confident in your strategy.
Does the Text Around an Image Really Matter for SEO?
Absolutely. Search engines have gotten incredibly smart; they don't just look at an image in isolation. They analyze everything around it—the page title, the headings, and the paragraph text—to get the full picture.
Think about it this way: if you have a great photo of a "blue Nike running shoe" on a page all about running gear and athletic footwear, Google gets a crystal-clear signal about what that image is. But if you drop that same photo onto a page about gardening, it just creates confusion. Always place your images where they make the most sense, surrounded by highly relevant text, to give search engines the strongest possible clues.
What’s the Perfect Image File Size?
There's no single magic number, but a fantastic rule of thumb is to keep your website images under 150 KB. This size works beautifully for most standard visuals you'd use in a blog post, on a service page, or in a product gallery.
Now, for those big, full-width hero images at the top of a page, you might need to stretch that to 300-400 KB to keep them looking sharp. Just make sure that's the exception, not the standard. The real goal is to get the file size as small as you can without anyone noticing a drop in quality. Modern formats like WebP make hitting these targets a whole lot easier.
Key Insight: Don't get hung up on one "perfect" file size. Instead, focus on making every single image as lightweight as possible for its specific job on the page. Aiming for under 150 KB for most images is a solid, achievable benchmark.
Should I Bother Using a CDN for My Images?
Yes, without a doubt. Using a Content Delivery Network (CDN) is one of the single best technical improvements you can make for your site's speed, especially if you have visitors from around the world.
A CDN essentially stores copies of your images on a network of servers spread across the globe. When someone from another country visits your site, the images load from the server closest to them, not from your main server halfway across the world. This dramatically cuts down load times, which is a huge win for both user experience and your Core Web Vitals scores—something Google definitely pays attention to. Many good hosting providers now include a CDN, and services like Cloudflare offer fantastic options to get started.
How Does Lazy Loading Affect Image SEO?
Lazy loading is a clever performance trick where images that are "below the fold" (outside the user's initial screen view) don't load until the user actually scrolls down to them. It’s a brilliant way to speed up your initial page load time, a major factor for Core Web Vitals.
Thankfully, you don't have to worry about SEO penalties here. Googlebot has evolved and is now smart enough to "scroll" and render the entire page during its crawl, so it can still discover and index your lazy-loaded images just fine. Implementing native, browser-level lazy loading is now a standard best practice. It’s a clear win-win: better performance without hurting your image SEO.
Ready to stop the manual grind and put your content creation on autopilot? IndexPilot uses trainable AI Agents to handle your entire SEO workflow—from keyword strategy and writing to optimization and publishing. Connect your CMS, set your schedule, and watch as high-quality, optimized content gets published for you, accelerating your organic traffic growth. Discover how IndexPilot can transform your SEO strategy.